Showing posts with label Intel Security. Show all posts

Friday, June 27, 2014

McAfee Next Generation Firewall (Stonesoft): Load balancing and QoS using Multi-Link


Overview

McAfee Multi-Link is a very useful feature for organization that need reliable and scalable internet connection. It's reliable since it allows user to have seamless internet connectivity during downtime of their primary ISP. It is scable since organization can easily add a new ISP over their existing without downtime.

The following videos will show you how to configure Multi-Link in various requirements

Note: For diagram, kindly reference to this post: http://nidofortified.blogspot.com/2014/06/configuring-mcafee-next-generation.html

Requirement 1: I want to make sure all High Priority traffic to pass on my ISP with larger bandwidth

In this video, I will show you how to use Multi-Link ratio mode with QoS.

I change my ISP A netlink bandwidth information from 100kbps into 300kbps
After security engine refresh, notice now that the NAT source IP change.

Requirement 2: I want to use QoS on my firewall policy

If you want to make sure that specific rule is being route on your most reliable or larger pipe ISP,
Make sure first that you applied QoS on your rule.

After that. Modify your Multi-Link to choose which ISP will handle your QoS.
Refresh security engine and verify it on your log viewer.


So that's it for now, if you have any question or have requirements you need to check if NGFW can support, just leave a comment. :-)

Thursday, June 19, 2014

Configuring McAfee Next Generation Firewall (Stonesoft) Multi-Link Feature

Overview

Multi-Link is a unique feature for McAfee NGFW. It helps organization reduce cost from buying large bandwidth from ISP. This is done by combining multiple ISP to create a single route for all network traffic.
Aside from reducing cost, it also improves reliability for organization that needs 24/7 operations since its capable enough to switch automatically on active/best ISP link.

Multi-Link also enables organization to have augmented VPN which again help improve operations and reliability.

Last, but not the least, Multi-Link can also be use for inbound traffic. So for example, you can have multiple link/route going to your web server to avoid service downtime for external users/costumers.

For more info, visit McAfee NGFW site here: http://www.mcafee.com/us/products/network-security/next-generation-firewall-technologies/multi-link.aspx

Configuration

Configuring Multi-Link is very simple, you will just need typically a multiple ISP connection and a popcorn (yes a popcorn, watching the logs as being load balance by NGFW by default :-) )

For this tutorial, my environment will have 2 ISP. ISP A will have 50kbps UP and 100kbps DOWN while ISP B will have 100kbps UP and 200kbps DOWN but has 1 extra hop before reaching the internet.


Now that you have an idea about my test environment, let's proceed for the configuration.

Step 1: Configure Physical Interface IP

Provide the IP address that will communicate on external network.

Step 2: Configure NetLinks

Just like adding normal static route, right click on the interface network and choose New -> Static Netlink (as shown below)
Note: There are two types of Netlink. Static and Dynamic, what they do will be discuss on separate tutorial.

A pop-up window will show for NetLink configuration.

Name - The unique name for this NetLink
Gateway - The next-hop IP address (Mostly your ISP router IP)
Network - The network segment given/assigned by your ISP
Probing settings - Useful for identifying active links and measuring the speed of each link.
Note: When adding IP address for probing, it is recommended to put IP address from external server instead of using the ISP router address (i.e. ISP router connection is not reliable since during downtime, you can still probably ping your ISP but does not have internet connection)
Input speed - The incoming bandwidth speed of this ISP
Output speed - The outgoing bandwidth speed for this ISP
Note: Placing a speed is mandatory if you need to configure QoS/load balancing

Click Ok then repeat steps in creating another NetLink for ISP B.
Below is an example of a complete NetLink configuration

Step 3: Creating Outbound Multi-Link

Select Outbound Multi-Link
Add the NetLink created for each ISP
From the NetLink Member window, provide the IP range that can be use by Multi-Link. The above shows that I only want single IP address to be use by my firewall. Leave QoS blank for now and click Ok.

Step 4: Creating NAT Rule

With this rule, it is saying that any outgoing connection will use either of the two ISP connection.

Step 5: Test Configuration

Start browsing and view the logs from SMC. You will notice here that the outgoing traffic is being NATed by different external IP of the firewall.

And that's it! You now have Multi-Link enabled for Outbound traffic.

I will update again this post to show you how I configured NGFW to solve the following scenario. Should you have request for certain scenario, do leave your comment. :-)

Scenario A: Apply Load Balancing
Scenario B: Restrict Specific Traffic from Specific Link
Update 1:
I combined Scenario A and B to this single post: Advance Setting for McAfee NGFW Multi-Link

Wednesday, May 28, 2014

Configuring McAfee NGFW (Stonesoft) Client to Site VPN (using Stonesoft IPSec VPN Client): Configuring VPN NAT Pool based client-to-site VPN

Overview

Stonesoft IPSec VPN in NAT Pool is an alternate of allowing remote users to establish VPN connection. This configuration does not require external DHCP server to provide IP for remote users. 

The disadvantage of using this configuration is the manual setup of DNS server on the remote user.

Requirements

McAfee NGFW 5.5 and later
McAfee Security Management Center (SMC) 5.7
Stonesoft IPSec VPN Client 5.4 or later

Procedures

  1. Log-on to McAfee SMC
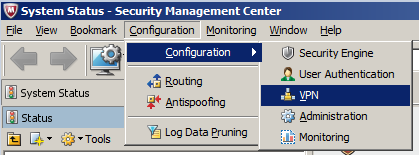
  2. Go to Configuration -> Configuration -> VPN
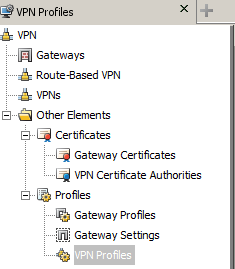
  1. Create a new VPN Profile by going to Other Elements -> Profiles -> VPN Profiles
Then Right-Click on VPN Profiles to choose New VPN Profile
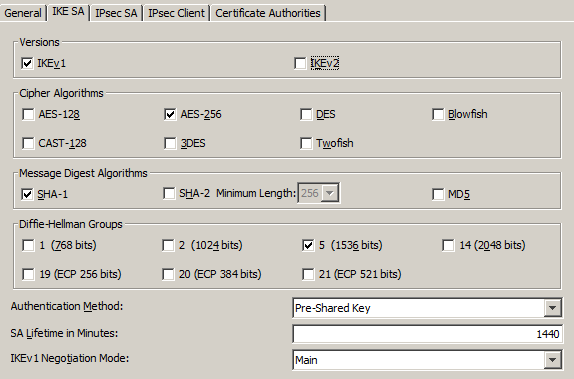
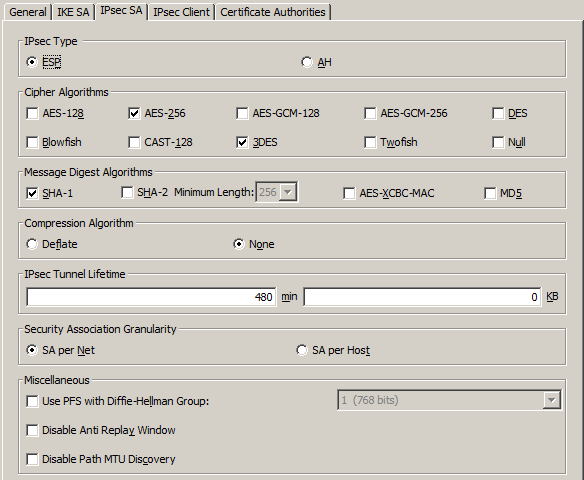
  1. On the new window, configure the following: (You may change the following depending on your security requirements)


Then click Ok

  1. Create a new VPN configuration, right-click on VPNs then choose New VPN
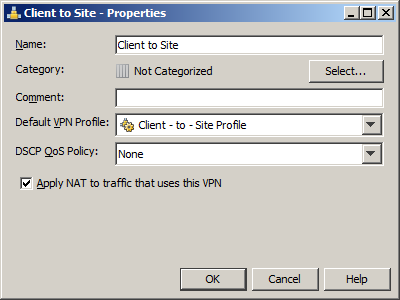
Choose the VPN Profile that was created earlier
Make sure to enable the checkbox when configuring VPN for NAT Pool

  1. On the Edit view for the VPN configuration,

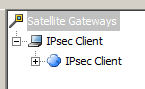
Add the default IPSec Client on the Satellite Gateways

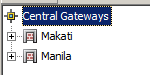
Create a new Internal VPN Gateway for the Central Gateways

Select the Security Engine (Firewall) that will be access by the remote users

Select the public (external) IP address that will be handling the VPN session

Uncheck the “Include and update addresses based on routing” since this will allow any remote user to access any network
If the VPN rule are not configured properly.

Add the network segment that you will be allowing network user to access.

Click Ok.

You may add multiple internal gateway if you manage multiple NGFW
  1. Set IP range that can be used by the remote users.
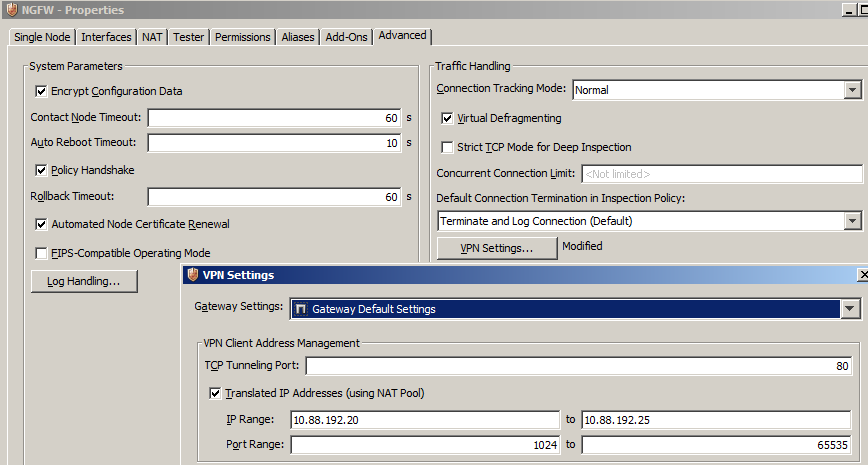
Go to NGFW properties, Advanced tab then click VPN Settings button.

Check the “Translated IP Addresses”, place the IP range and port range (from 1024 to 65535)

Click Ok.

  1. Create VPN users account locally on the firewall
Go to Configuration -> Configuration -> User Authentication

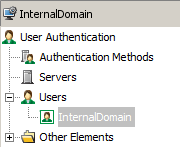
To create a new local user account, expand Users then choose InternalDomain

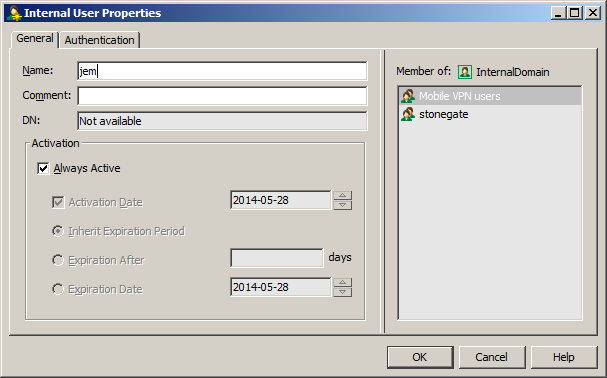
Expand stonegate domain then create a new user under Mobile VPN user

Input username on the Name field, modify the Activation based on your requirement.

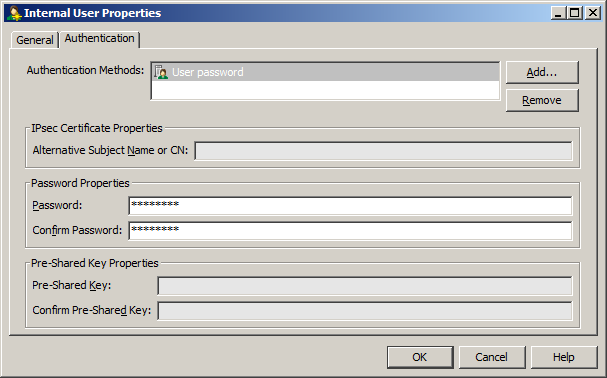
Set user authentication as User password then initialize the user’s password (take note of this so you can send it to the user afterwards)

A successful user authentication will show the following

  1. Create a new rule on your current Firewall Policy that will have the following configuration
Source IP: Any
Destination IP:
Service: Any
Action: Enforce VPN: Client to Site
Authentication: Select Authorize Client IP, Select the Group where the VPN users are stored, Choose the authentication type being use by the user

  1. Upload the rule to your firewall
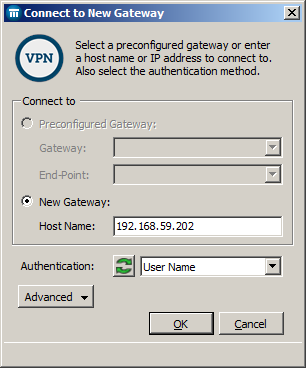
  2. Test your VPN setting by connecting via Stonesoft VPN client

Input the public IP of the firewall that will accept VPN connection

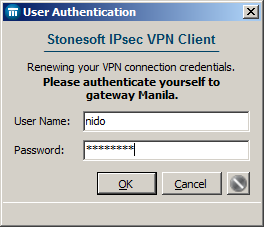
Successful connection will prompt user authentication dialog

Successful authentication will establish connection

You should now able to access the server/workstation behind the firewall

Note: Unlike other IPSec VPN client, Stonesoft’s client will not disconnect your internet connection or will reconfigure the IP address of your network interface. So while you can access the internal network, you may still continue to access the Internet.