Overview
Stonesoft IPSec VPN in NAT Pool is an alternate of allowing remote users to establish VPN connection. This configuration does not require external DHCP server to provide IP for remote users.
The disadvantage of using this configuration is the manual setup of DNS server on the remote user.
Requirements
McAfee NGFW 5.5 and later
McAfee Security Management Center (SMC) 5.7
Stonesoft IPSec VPN Client 5.4 or later
Procedures
-
Log-on to McAfee SMC
-
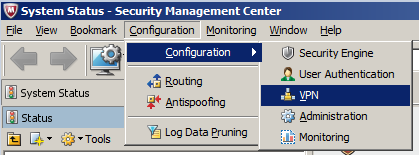
Go to Configuration -> Configuration -> VPN
-
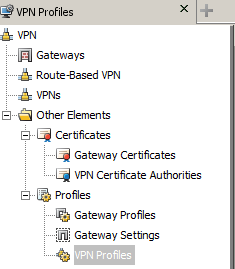
Create a new VPN Profile by going to Other Elements -> Profiles -> VPN Profiles
Then Right-Click on VPN Profiles to choose New VPN Profile
-
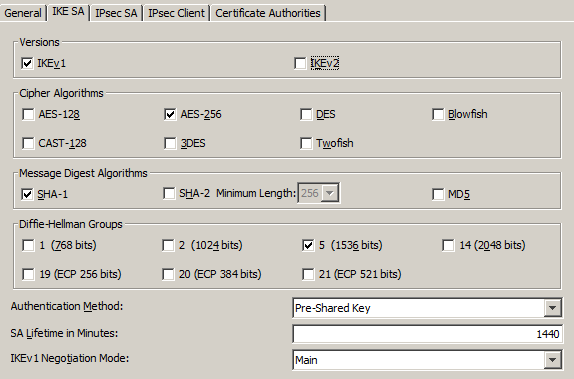
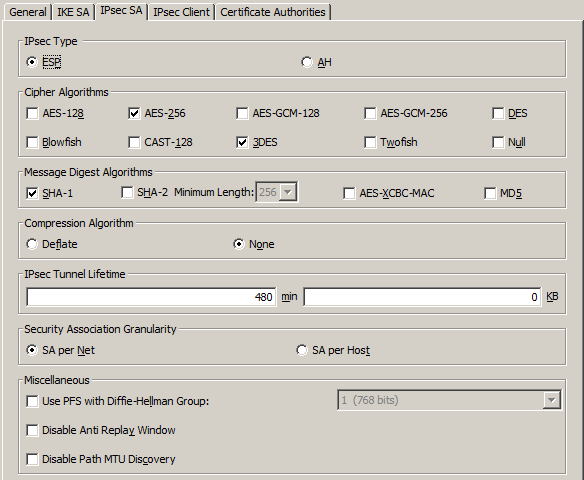
On the new window, configure the following: (You may change the following depending on your security requirements)


Then click Ok
-
Create a new VPN configuration, right-click on VPNs then choose New VPN
Choose the VPN Profile that was created earlier
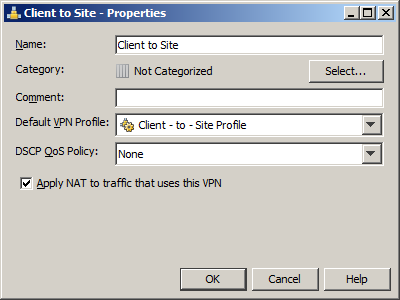 Make sure to enable the checkbox when configuring VPN for NAT Pool
-
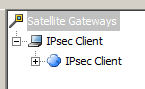
On the Edit view for the VPN configuration,
Add the default IPSec Client on the Satellite Gateways
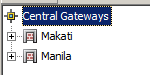
Create a new Internal VPN Gateway for the Central Gateways
Select the Security Engine (Firewall) that will be access by the remote users

Select the public (external) IP address that will be handling the VPN session

Uncheck the “Include and update addresses based on routing” since this will allow any remote user to access any network
If the VPN rule are not configured properly.
Add the network segment that you will be allowing network user to access.

Click Ok.
You may add multiple internal gateway if you manage multiple NGFW
-
Set IP range that can be used by the remote users.
Go to NGFW properties, Advanced tab then click VPN Settings button.
Check the “Translated IP Addresses”, place the IP range and port range (from 1024 to 65535)
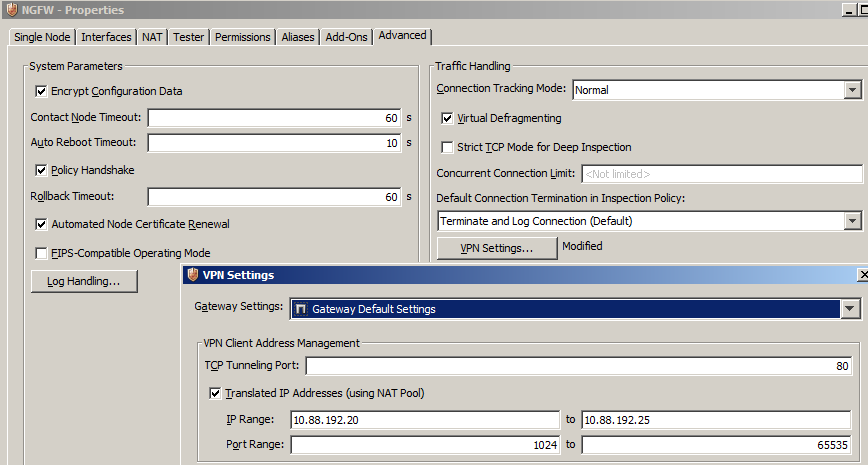
Click Ok.
-
Create VPN users account locally on the firewall
Go to Configuration -> Configuration -> User Authentication
To create a new local user account, expand Users then choose InternalDomain
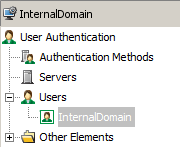
Expand stonegate domain then create a new user under Mobile VPN user
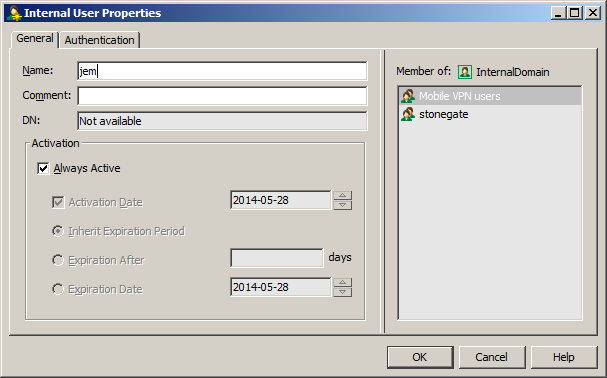
Input username on the Name field, modify the Activation based on your requirement.
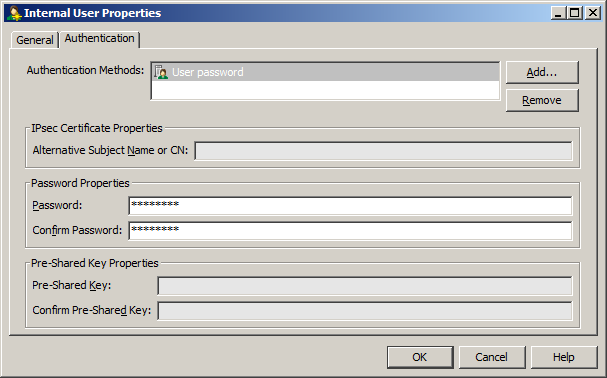
Set user authentication as User password then initialize the user’s password (take note of this so you can send it to the user afterwards)
A successful user authentication will show the following

-
Create a new rule on your current Firewall Policy that will have the following configuration
Source IP: Any
Destination IP: 
-
Upload the rule to your firewall
-
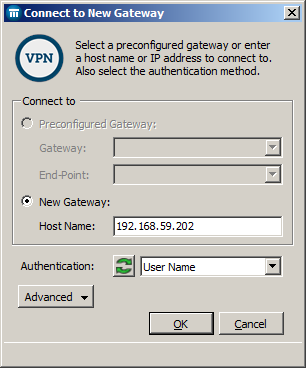
Test your VPN setting by connecting via Stonesoft VPN client
Input the public IP of the firewall that will accept VPN connection
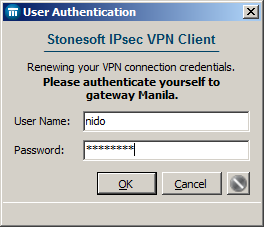
Successful connection will prompt user authentication dialog
Successful authentication will establish connection

You should now able to access the server/workstation behind the firewall
Note: Unlike other IPSec VPN client, Stonesoft’s client will not disconnect your internet connection or will reconfigure the IP address of your network interface. So while you can access the internal network, you may still continue to access the Internet.
Overview
Stonesoft IPSec VPN in NAT Pool is an alternate of allowing remote users to establish VPN connection. This configuration does not require external DHCP server to provide IP for remote users.
The disadvantage of using this configuration is the manual setup of DNS server on the remote user.
Requirements
McAfee NGFW 5.5 and later
McAfee Security Management Center (SMC) 5.7
Stonesoft IPSec VPN Client 5.4 or later
Procedures
- Log-on to McAfee SMC
- Go to Configuration -> Configuration -> VPN
- Create a new VPN Profile by going to Other Elements -> Profiles -> VPN Profiles
Then Right-Click on VPN Profiles to choose New VPN Profile
- On the new window, configure the following: (You may change the following depending on your security requirements)
Then click Ok
- Create a new VPN configuration, right-click on VPNs then choose New VPN
Choose the VPN Profile that was created earlier
Make sure to enable the checkbox when configuring VPN for NAT Pool
- On the Edit view for the VPN configuration,
Add the default IPSec Client on the Satellite Gateways
Create a new Internal VPN Gateway for the Central Gateways
Select the Security Engine (Firewall) that will be access by the remote users
Select the public (external) IP address that will be handling the VPN session
Uncheck the “Include and update addresses based on routing” since this will allow any remote user to access any network
If the VPN rule are not configured properly.
Add the network segment that you will be allowing network user to access.
Click Ok.
You may add multiple internal gateway if you manage multiple NGFW
- Set IP range that can be used by the remote users.
Go to NGFW properties, Advanced tab then click VPN Settings button.
Check the “Translated IP Addresses”, place the IP range and port range (from 1024 to 65535)
Click Ok.
- Create VPN users account locally on the firewall
Go to Configuration -> Configuration -> User Authentication
To create a new local user account, expand Users then choose InternalDomain
Expand stonegate domain then create a new user under Mobile VPN user
Input username on the Name field, modify the Activation based on your requirement.
Set user authentication as User password then initialize the user’s password (take note of this so you can send it to the user afterwards)
A successful user authentication will show the following
- Create a new rule on your current Firewall Policy that will have the following configuration
Source IP: Any
Destination IP:
Service: Any
Action: Enforce VPN: Client to Site
Authentication: Select Authorize Client IP, Select the Group where the VPN users are stored, Choose the authentication type being use by the user
- Upload the rule to your firewall
- Test your VPN setting by connecting via Stonesoft VPN client
Input the public IP of the firewall that will accept VPN connection
Successful connection will prompt user authentication dialog
Successful authentication will establish connection
You should now able to access the server/workstation behind the firewall
Note: Unlike other IPSec VPN client, Stonesoft’s client will not disconnect your internet connection or will reconfigure the IP address of your network interface. So while you can access the internal network, you may still continue to access the Internet.
No comments:
Post a Comment
Kindly respect the author website and its reader.